
Knots

A good fishing knot is important to the success of any angler. Tying a fishing knot takes practice to learn but will help reduce the chance of losing a fish because of the line breaking or the knot coming undone. The purpose of a fishing knot is to provide a strong knot while not degrading the quality of your fishing line. Tying a regular knot in fishing line will reduce its strength significantly. If you are using 12 pound-test line and tie a simple knot in the line, the strength of the line at that knot will be much less than the advertised 12 pounds. An improper knot will easily result in a broken line and loss of the fish, bait and lure. The improved clinch knot is one of the easiest fishing knots to tie and is a knot many anglers learned when they were beginners. Read on for instructions on how to properly tie an improved clinch knot.

Practice tying a knot multiple times to help you remember it.

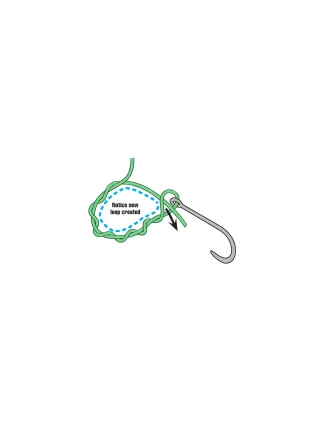
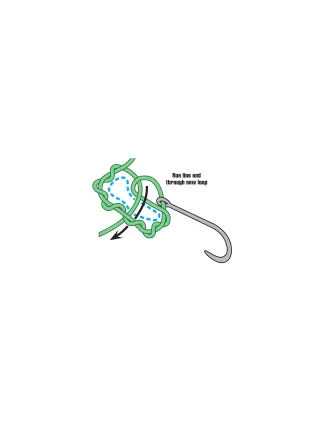
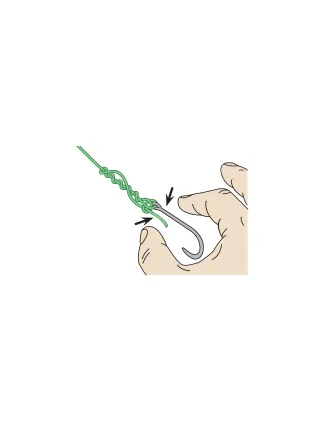
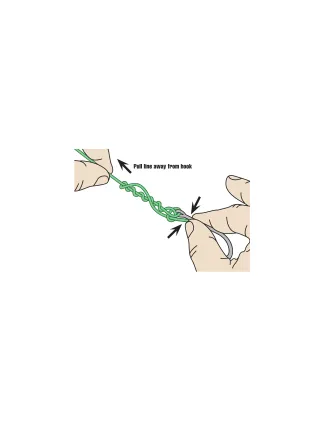
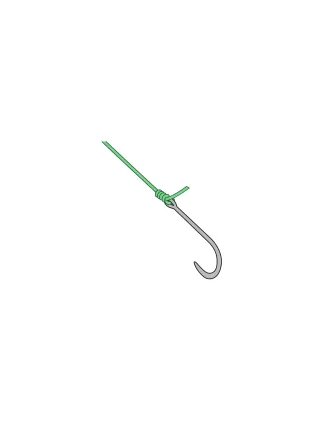
How to tie an improved clinch knot:

Image
A hook and fishing line.
Thomas Hilley
Step 1: Have your hook and the end of your fishing line.
Image
Fishing line through the eye of the hook.
Thomas Hilley
Step 2: Run the end of your line through the eye of the hook.
Image
Twisting the fishing line around itself.
Thomas Hilley
Step 3: Twist the line around five or six times.
Image
The end of the fishing line going through the new loop created above the eye of the hook.
Thomas Hilley
Step 4: Run the end of the line through the loop above the hook’s eye, but notice the new loop you are creating as you run the line through the loop. 
Image
Putting the end of the fishing line through the final loop.
Thomas Hilley
Step 5: Now run the end of the line through the new loop you created in the last step.
Image
Straightening the fishing line.
Thomas Hilley
Step 6: Straighten your line for the next step.
Image
Pinching the line and the eye of the hook together.
Thomas Hilley
Step 7: Hold down the end of the line and the hook together with one hand.
Image
Pulling the line and hook away from each other.
Thomas Hilley
Step 8: With the end of the line and hook in one hand, gently pull the other end of the line away from the hook. Remember you have a hook in your other hand, so be careful not to pull too hard or you could hook yourself.
Image
The knot tightening down on the eye of the hook.
Thomas Hilley
Step 9: Once your knot is pulled down tight, this is what you should have. If you have excess line hanging from the knot, you can cut it. But don’t cut it too close to the knot or it will come undone.


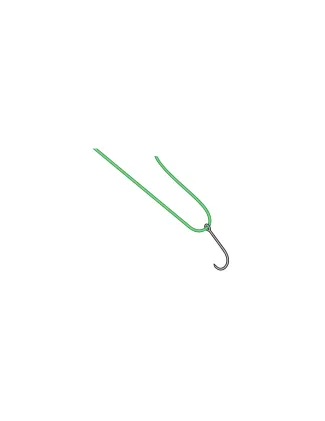
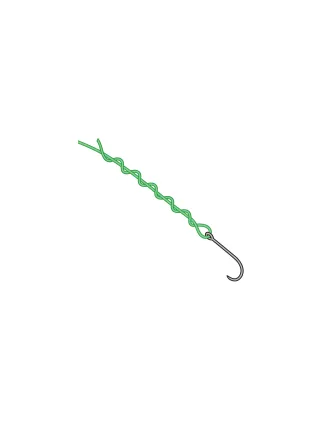
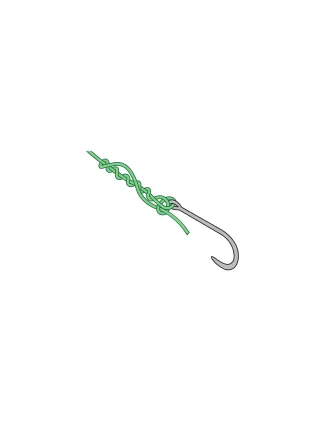
When using monofilament line it helps to “wet” your line before pulling it tight. To “wet” your line either place the line in your mouth or water. The moisture provides a lubricant that will help the line cinch down easier, but will also protect the line from being damaged by the friction.

Image
An image of an arbor knot. Commonly used to tie fishing line around the reel.
Thomas Hilley
Another useful knot is the arbor knot. It can be used to tie your fishing line to your reel.


Casting

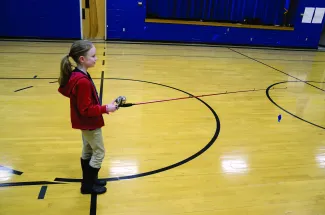
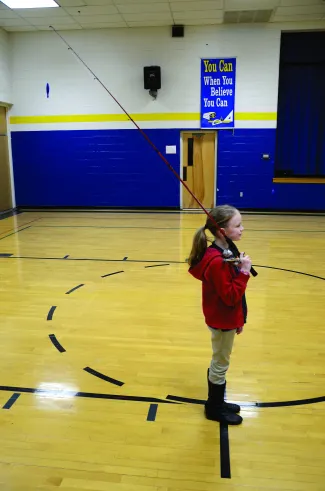
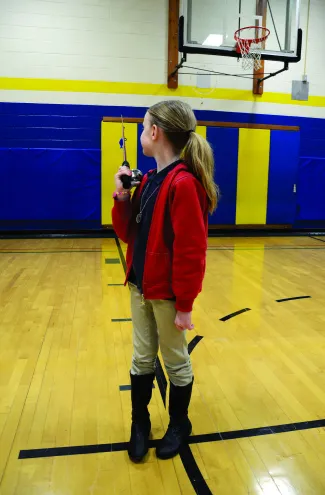
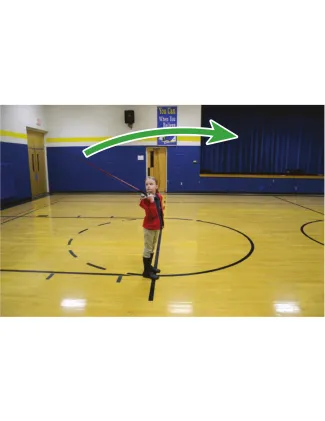
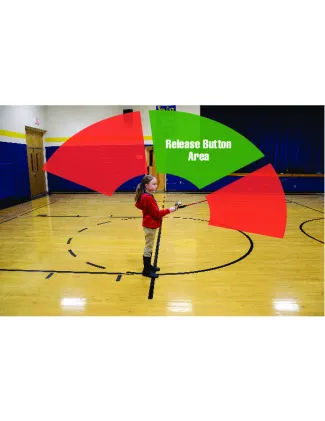
Knowing how to properly cast is an important part to becoming an angler. There are many different ways to cast, but the simplest and easiest to do is the overhand technique using a spincast reel. The key thing to remember when casting is SAFETY! Remember you have a hook swinging from the other end of the line! Make sure nobody is in the way to avoid any serious injury. And be aware of any other objects such as trees that could be hooked to help avoid damage to equipment and save time from possible tangles. Anyone who can drink a cup of water can cast. Before casting, practice this simple motion of drinking from a cup.

Image
A girl practicing casting with a cup of water.
Just like picking up a cup from a table, your elbow should
be at your side and bent at a 90-degree angle.
Image
A girl practicing casting with a cup of water.
Keep your elbow pointed down at your side, then bring the cup to your mouth.

Now, using a spincast rod and reel, repeat the same thing.

Image
A girl holding a spincast rod/reel.
1: Hold the rod pointed out in front of you, and be sure your feet (toes) are pointed in the direction you wish to cast.
Image
A girl holding a spincast rod/reel.
2: Push the button on the back of the reel, hold in the button, and slowly bring the rod over your shoulder. (Notice how your elbow should remain pointed down and at your side.)
Image
A girl holding a spincast rod/reel.
3: Now look behind you to make sure nobody is standing there or that no objects are in the way before you finish your cast.
Image
A girl holding a spincast rod/reel.
Image
A girl holding a spincast rod/reel.
4: When you are sure the area behind you is clear, bring the rod forward while keeping your elbow down, and release the button right after the rod points directly up.


Back to Beginning Read Next Chapter

This content originally appeared in the Wildlife Department’s "Fishing in the Schools Manual." The full PDF manual can be viewed here.

OOJ Tags